Forms Guide
Forms and drawings guide for Drawing with Nat: Dream Diary. (Ver.0.2).
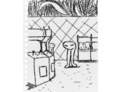
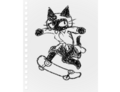
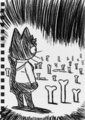
Skateboard

Perform some stylish tricks.
Appearance: Nat carries a skateboard and wears a helmet.
Passive Effect: Nat doubles her movement speed whilst riding the skateboard.
Action: (A) Swap between skating mode and walking mode. (X) Perform a pose whilst in riding mode
Location: Found in Pattern world.
Practical Uses: Allows the player to travel the dream world faster.
Nexus → Pattern World.
Enter the Elevator and go to Pattern world (The 4th option). Head southwest until you find a hole in the wall. On the other side of the wall you will find a flow of patterns that snake to the right. Follow this path to its very end and then head left. You should then find the effect.
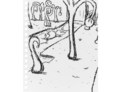
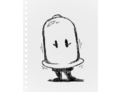
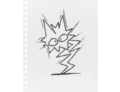
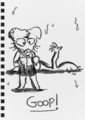
Goop

Begin melting.
Appearance: Nat melts slightly and turns black and white.
Passive Effect: Can squeeze into small spaces whilst melted.
Action: (A) Nat melts which makes her move very slowly.
Location: Found in Goop World.
Practical Uses: Can be used to enter the upper part of Sewers and also enter the Red room.
Nexus → Pattern World → Owl Folk World → Dark Cave (Lamp form recommended) → Goop World.
Enter the Elevator and go to Pattern world (The 4th option). Head southwest until you find a hole in the wall. On the other side of the wall you will find a flow of patterns that snake to the right. Follow it until it curves to the left, once at this curve head right to see a small structure, slightly below this is the warp to Owl Folk World. In Owl Folk world head directly south until you see a pink owl, head directly right from that until you see 2 black owls and a statue that looks different. The Lamp form is almost required for the Dark caves, but make your way south as much as possible to enter Goop World. In Goop World head slightly south until you stand on a decent amount of goop, with a small hole to your left. From here head east, you should pass a bench along the way. Continue past this bench until you find the effect.
OR
Nexus → Sandy Statues → The Halls → Underhalls → Creepy faces area (Vanish form recommended) → Goop World.
Enter the Elevator and go to Sandy Statues (The 2nd option). Head west from the elevator and you should find statues that gradually get less burried as you follow them. Following them northwest will reveal a statue with blue eyes and a staircase. In the Halls head to the south room, followed by the room to the east, enter the third door you see heading east and you should end up outside. Head south here until you hit a wall, then move to the right and head south once more, once you hit another wall you'll find that the door is on the other side of that wall. Enter the door and take the ladder down to the Underhalls. Follow the path until you reach a fork that heads left and right, head left here. Keep following the path until you find a door. The Vanish form is required for this next area, otherwise you will get caught by the Dicehead enemies. Walk between the two pink tendrils and head southeast until you find a pair of black and white tendrils, walk through them. In Goop World head directly north and you should see a long row of tendrils, go directly up from the middle of this row and you should eventually find the effect.
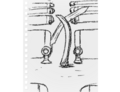
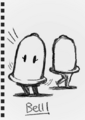
Bell

Ring for assistance.
Appearance: Nat turns into a large brass bell.
Passive Effect: Nat moves slightly slower.
Action: (A) Nat's eye closes and she tolls the bell.
Location: Found in the Hermit Pyramids area.
Practical Uses: Allows the player to warp to the Elevator.
Nexus → Sandy Statues → Hermit Pyramids.
Enter the Elevator and go to Sandy Statues (The 2nd option). Head south from the elevator until you see a group of peach coloured plants, head east and a tiny bit north from here and you should find a ring of statues, interact with the center statue. Now in the Hermit Pyramids area head south until you reach a black void blacking your path, hug this boundary and head left until you find a single large pyramid, head south directly from this pyramid and you should find the effect.
Balloon

Fill yourself with air.
Appearance: Nat inflates and lifts into the air.
Passive Effect: Nat moves slightly slower and can float over gaps.
Action: (A) None.
Location: Found in Desktop world.
Practical Uses: Can be used to cross over gaps in certain areas, for example the Pink clouds area or the Underhalls.
Nexus → Bone World → Yellow Moon → Desktop World.
Enter the Elevator and go to Bone World (The 3rd option). Head east until you reach a pair of bones, head directly south from here until you find the warp to Yellow Moon. In Yellow Moon head northwest as far as you can go until you find a hole, entering this hole should take you to an upper area of the Yellow Moon, from here interact with the computer to enter Desktop world. In Desktop world follow the path forward until you reach a fork in the path just after some dancing cats. Head east here until another fork, head east again until yet another fork in the path, this time head north until you reach a massive white area, hug the west side of this area and head north until you can walk on the ground again. Head west here and you should find the effect.
OR
Nexus → Glow World → Arcade → Desktop World.
Enter the Elevator and go to Glow World (The 5th option). Head directly south from the Elevator until you find a door that leads to the Arcade. Head northwest in the arcade until you reach the box maze. In the box maze follow these steps: East → South → West → South again → East → South → West until you cannot continue. → North → East → North → West → North → West until you cannot continue. → South → West → South → West → North and you should then find the warp to Desktop world. In Desktop world head east and follow the path until you reach a fork, head west here and there should be an immediate fork again, head north until you reach a massive white area, hug the west side of this area and head north until you can walk on the ground again. Head west here and you should find the effect.
OR
Nexus → Pattern World → Berry Woods → Sugary Treat World → Desktop World.
Enter the Elevator and go to Pattern world (The 4th option). Head southwest until you find a hole in the wall. On the other side of the wall you will find a flow of patterns that snake to the right. Follow it until it curves to the left, once at this curve head right to see a small structure, slightly below this is the warp to Owl Folk World. Head south until you see a pink and red bird next to eachother, head west from here and you should find a long row of birds, head to the end of this row and go straight south and you should find the warp to Berry Woods. In Berry Woods head directly south until a tree blocks your path, from here head directly east and you should find another berry warp, this one takes you to Sugary Trear World. In Sugary Treat World head west until you find a small biscuit bridge, go across this bridge and then head north until you find another bridge, crossing this bridge you'll find a warp to Desktop World. Once in Desktop world head east and follow the path ahead. Eventually you will reach a fork in the paths, head west here and there should be an immediate fork again, head north until you reach a massive white area, hug the west side of this area and head north until you can walk on the ground again. Head west here and you should find the effect.
OR
Nexus → Sandy Statues → The Halls → Underhalls → Desktop World.
Enter the Elevator and go to Sandy Statues (The 2nd option). Head west from the elevator and you should find statues that gradually get less burried as you follow them. Following them northwest will reveal a statue with blue eyes and a staircase. In the Halls head to the south room, followed by the room to the east, enter the third door you see heading east and you should end up outside. Head south here until you hit a wall, then move to the right and head south once more, once you hit another wall you'll find that the door is on the other side of that wall. Enter the door and take the ladder down to the Underhalls. Follow the path until you reach a fork that heads left and right, head right here. You'll find two paths up ahead, one features a spring creature and the other is a direct path that continues downward, take the path with the spring creature. Keep following this path until you reach a large patch of ground, head south here and you should find a door that leads to Desktop World. Once in Desktop world head directly west and you should find the effect.
OR
Nexus → Desktop World (If shortcut is available).
Go into Nat's bedroom in the dream world and interact with the computer. If the shortcut has been opened this will take you to Desktop World. From here head east here until you find a fork in the paths, head east again until yet another fork in the path, this time head north until you reach a massive white area, hug the west side of this area and head north until you can walk on the ground again. Head west here and you should find the effect.
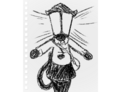
Lamp

Illuminate the darkness.
Appearance: Nat's head becomes a lamp.
Passive Effect: Lights up dark areas.
Action: (A) Can toggle the lamp on or off.
Location: Found in the Lamp paths area.
Practical Uses: Can be used to easily navigate the Dark Cave area.
Nexus → Glow World → Lamp Paths.
Enter the Elevator and go to Glow World (The 5th option). Head east from the Elevator until you find the tiled ground again, once you do head north and you should find a telephone pole. Now in the Lamp Paths head west, then head north and follow the path along until you reach a fork in the road, head east from here instead of south. Up ahead you will find another fork in the road, this time head north. You should then arrive in a new area and the effect can be found by heading north.
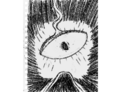
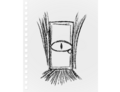
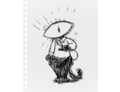
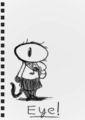
Eye

See the unseen.
Appearance: Nat's head turns into a single large eye.
Passive Effect: Can reveal hidden doors.
Action: (A) Reacts when a hidden door is nearby.
Location: Found in Bone World.
Practical Uses: Can be used to enter Eye World and find secret Eye doors.
Nexus → Bone World
Enter the Elevator and go to Bone World (The 3rd option). Head directly west from the Elevator until you find four bones spaced out equally, head directly south from here and you should find the home of the Eye man. Talk to the Eye man to get the effect.
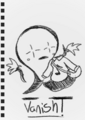
Vanish

Hide yourself from threats.
Appearance: Nat's body becomes invisible, however her clothing does not.
Passive Effect: Dicehead enemies will ignore you.
Action: (A) None.
Location: Found in the Arcade basement.
Practical Uses: Can be used to safely get past any areas guarded by Dicehead enemies.
Nexus → Glow World → Arcade
Enter the Elevator and go to Glow World (The 5th option). Head directly south from the Elevator until you find a door that leads to the Arcade. Head northwest in the arcade until you reach the box maze. In the box maze follow these steps: East → South → West → South again → East → Head South but hug the wall until you can head East → Keep heading East until you cannot continue → North → East → South → East. After that you should find a ghost character who gives you the effect.
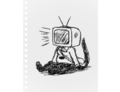
TV

Change the signal.
Appearance: Nat's head turns into a TV.
Passive Effect: If the dicehead channel is active, Dicehead enemies will ignore you.
Action: (A) Randomly changes the image displayed on the screen.
Location: Found in The Upper Sewers.
Practical Uses: Can be used to safely get past any areas guarded by Dicehead enemies if the right channel is active.
Nexus → Sandy Statues → The Halls → Upper Sewers (Goop form required)
Enter the Elevator and go to Sandy Statues (The 2nd option). Head west from the elevator and you should find statues that gradually get less burried as you follow them. Following them northwest will reveal a statue with blue eyes and a staircase. Once in the halls take the first door north, then head west and enter the last door in the room. Keep heading west until you meet a wall, take the last door. After heading down some stairs take another door on the left side of the room, you should now be in a garden area. Follow the path in the garden until you reach a sewer grate. Use the Goop form (Or Jel-e form) and enter the sewers via the grate. Once in the sewers head east until you find a door, in this room you should find the effect.
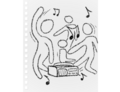
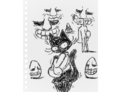
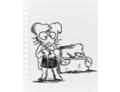
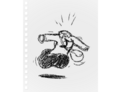
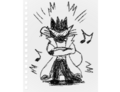
Rockstar

Create sound waves.
Appearance: Nat dresses up as a rock star.
Passive Effect: None
Action: (A) Swap between Guitar mode and walking mode. In Guitar mode use the arrow keys to create sounds. (X) Change the tune of the guitar.
Location: Found in Bliss's room.
Practical Uses: None.
Nexus → Sandy Statues → The Halls → Underhalls → Creepy faces area (Vanish form recommended) → Bliss's room.
Enter the Elevator and go to Sandy Statues (The 2nd option). Head west from the elevator and you should find statues that gradually get less burried as you follow them. Following them northwest will reveal a statue with blue eyes and a staircase. In the Halls head to the south room, followed by the room to the east, enter the third door you see heading east and you should end up outside. Head south here until you hit a wall, then move to the right and head south once more, once you hit another wall you'll find that the door is on the other side of that wall. Enter the door and take the ladder down to the Underhalls. Follow the path until you reach a fork that heads left and right, head left here. Keep following the path until you find a door. The Vanish form is required for this next area, otherwise you will get caught by the Dicehead enemies. Walk between the two pink tendrils and head south and a little bit to the east and you should find a pair of purple tendrils, walk between them. Head north in this small area full of trash bags and you should find a door. The effect can be found on the left side of the room.
OR
Nexus → Pattern World → Owl Folk World → Dark Cave (Lamp form recommended) → Goop World → Creepy faces area (Vanish form recommended) → Bliss's room.
Enter the Elevator and go to Pattern world (The 4th option). Head southwest until you find a hole in the wall. On the other side of the wall you will find a flow of patterns that snake to the right. Follow it until it curves to the left, once at this curve head right to see a small structure, slightly below this is the warp to Owl Folk World. In Owl Folk world head directly south until you see a pink owl, head directly right from that until you see 2 black owls and a statue that looks different. The Lamp form is almost required for the Dark caves, but make your way south as much as possible to enter Goop World. In Goop World go behind the cave enterance and head north until you find a white patch with a thin road connected to it on both sides. This road loops through the whole world, follow this road west until you find a row of tendrils, head to the end of the tendrils and go directly south and you should find another pair of tendril. The Vanish form is required for this next area, otherwise you will get caught by the Dicehead enemies. Walk between the two tendrils and head directly east until you find a pair of purple tendrils, walk between them. Head north in this small area full of trash bags and you should find a door. The effect can be found on the left side of the room.
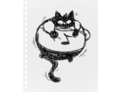
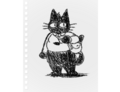
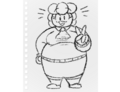
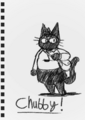
Chubby

Gain weight.
Appearance: Nat becomes fatter.
Passive Effect: None.
Action: (A) None.
Location: Found in Sugary Treat World.
Practical Uses: None.
Nexus → Pattern World → Berry Woods → Sugary Treat World.
Enter the Elevator and go to Pattern world (The 4th option). Head southwest until you find a hole in the wall. On the other side of the wall you will find a flow of patterns that snake to the right. Follow it until it curves to the left, once at this curve head right to see a small structure, slightly below this is the warp to Owl Folk World. Head south until you see a pink and red bird next to eachother, head west from here and you should find a long row of birds, head to the end of this row and go straight south and you should find the warp to Berry Woods. In Berry Woods head directly south until a tree blocks your path, from here head directly east and you should find another berry warp, this one takes you to Sugary Trear World. In Sugary Treat World head west until you find a small biscuit bridge, do not cross it. Instead hug the wall northwest until you find yet another bridge. From here hug the wall to the east until you find your effect.
OR
Nexus → Bone World → Yellow Moon → Desktop World → Sugary Treat World.
Enter the Elevator and go to Bone World (The 3rd option). Head east until you reach a pair of bones, head directly south from here until you find the warp to Yellow Moon. In Yellow Moon head northwest as far as you can go until you find a hole, entering this hole should take you to an upper area of the Yellow Moon, from here interact with the computer to enter Desktop world. In Desktop world follow the path forward until you reach a fork in the path just after some dancing cats. Head east here until another fork, head east again until yet another fork in the path, head east slightly and then south from here. Then follow the path ahead until you have a fork that heads north and south, head south here and continue following the path forward until you reach Sugary Treat World. In Sugary Treat World head south over a bridge and hug the wall to the east until you find another bridge. From here hug the wall northwest until you find yet another bridge. From here hug the wall to the east until you find your effect.
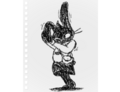
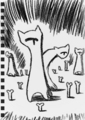
Bunny

Become a rabbit.
Appearance: Nat becomes a bunny.
Passive Effect: None.
Action: (A) Can hop in place.
Location: Found in Eraser World.
Practical Uses: None.
Nexus → Pattern World → Pointing Valley → Eraser World.
Enter the Elevator and go to Pattern world (The 4th option). Head east from the elevator until you find two different paths, take the top path. Follow this path forward until you reach a fork in the paths, continue on east and follow the path until you find a statue. Interacting with this statue will take you to the Pointing Valley. Once the giant finger is following you in Pointing Valley head directly east and you should eventually arrive in Eraser World. Once in Eraser World move slightly to the right and then head directly North until you find the effect.
OR
Nexus → Bone World → Crossroads → Eraser World.
Enter the Elevator and go to Bone World (The 3rd option). Head directly west from the Elevator until you find four bones spaced out equally, head directly south from here and you should find the home of the Eye man. Continue past his house until you find a bench, head slightly east from this bench and then North and you should find the warp to the Crossroads. In the Crossroads head directly south until the pillars are a cyan colour, then head east and you should find the warp to Eraser World. Once in Eraser World head directly North until you find the effect.
Jel-e (Secret)

Become Jel-e, the slime lady.
Appearance: Nat becomes a slime lady.
Passive Effect: Can squeeze into small spaces whilst melted.
Action: (A) Jel transforms into a smaller slime.
Location: Found in Slime World.
Practical Uses: Can be used to enter the upper part of Sewers and also enter the Red room.
Code to unlock: Jel-e or Jeledraws
Nexus → Bone World → Crossroads → Slime World.
Enter the Elevator and go to Bone World (The 3rd option). Head directly west from the Elevator until you find four bones spaced out equally, head directly south from here and you should find the home of the Eye man. Continue past his house until you find a bench, head slightly east from this bench and then North and you should find the warp to the Crossroads. In the Crossroads head north until the pillars are a redish orange colour, then head directly east and you should find the warp to Slime World. Once in Slime World head west until you see a ladder, head straight down from this ladder and you should find the effect rapidly moving around the area.
OR
Nexus → Glow World → Lamp Paths → Plaza → Pink Clouds (Balloon form required) → Slime World.
Enter the Elevator and go to Glow World (The 5th option). Head east from the Elevator until you find the tiled ground again, once you do head north and you should find a telephone pole. Once in the Lamp paths head south until you find a fork in the road, head north from here and you should then find a 4 way connection, head east. Continue heading east until you find a red lamp, interacting with this lamp will take you to the Plaza. In the plaza head directly east until you find a ladder. The Balloon form is required for this next area. In the pink clouds area head north and use the Balloon form to float over any gaps. Continue heading north until you cannot go any further, then head west until you reach a ladder, this ladder will take you to Slime World. Head straight down from the ladder and you should find the effect rapidly moving around the area.
OR
Nexus → Pink Clouds (If shortcut is available) → Slime World.
Go to the roof of the nexus. If the Pink Clouds shortcut has been unlocked the use the ladder. In the pink clouds area head north and use the Balloon form to float over any gaps. Continue heading north until you cannot go any further, then head west until you reach a ladder, this ladder will take you to Slime World. Head straight down from the ladder and you should find the effect rapidly moving around the area.
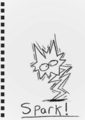
Spark (Secret)

Become an electrical entity.
Appearance: Nat becomes an electrical being.
Passive Effect: Nat doubles her movement speed.
Action: (A) None.
Location: Found in the Nexus hallway.
Practical Uses: Allows the player to travel the dream world faster.
Code to unlock: Spark
Nexus
Type in the code within the terminal room and the effect is instantly unlocked.
Drawings
All of the Drawings that can be obtained in Version 0.2
01: Obtained during the Tutorial.
02: Obtained by viewing the mirror.
03: Obtained by talking to Marco.
(Secret) 03: Obtained by talking to Paul.
04: Obtained by talking to the Eye man.
05: Obtained by talking to Bliss.
06: Obtained by talking to Alexe.
07: Obtained by getting caught by a Dicehead.
08: Obtained by interacting with the Tall Weeper.
09: Obtained by interacting with Llygad.
10: Obtained by visting the Elevator.

11: Obtained by sleeping for the first time.
12: Obtained by visiting the Sandy Statues.
13: Obtained by visiting the Hermit Pyramids.
14: Obtained by visiting the Pink Beach.
15: Obtained by visiting the Halls.
(Secret) 15: Obtained by interacting with Melys.
16: Obtained by joining the ghost party.
17: Obtained by visiting the Underhalls.
18: Obtained by interacting with the wall in Eye World.
19: Obtained by visiting the Hanging Eye.
(Secret) 19: Obtained by witnessing the Hanging Eye event.
20: Obtained by visiting the Creepy faces area.
21: Obtained by visiting the Printed Paths.
22: Obtained by visiting the Sewers.
23: Obtained by finding the Sewer Glob.
24: Obtained by visiting Slime World.
25: Obtained by visiting the Pink Clouds.
26: Obtained by interacting with the Blue Beings.

27: Obtained by visiting Bone World.
28: Obtained by visiting the Yellow Moon.
29: Obtained by visiting the Sphere.
30: Obtained by visiting Desktop World.
31: Obtained by visiting Sugary Treat World.
32: Obtained by visiting Pattern World.
33: Obtained by visiting Pointing finger valley.
34: Obtained by visiting Eraser World.
35: Obtained by visiting Owl Folk World.
36: Obtained by visiting the Dark Cave.
37: Obtained by visiting the Cliff.
38: Obtained by visiting Goop World.
39: Obtained by visiting Glow World.
40: Obtained by visiting the Soda guy.
41: Obtained by visiting the Lamp Paths.
42: Obtained by interacting with the Queen Statue.
43: Obtained by visiting the Plaza.
44: Obtained by visiting The Arcade.
45: Obtained by visiting Berry Woods.
46: Obtained by visiting the Crossroads.

47: Obtained by visiting Red World.
48: Obtained by finding the ACE event.
49: Obtained by visiting any secret Eye door.
50: Obtained by gaining the Skateboard form.
51: Obtained by gaining the Goop form.
52: Obtained by gaining the Bell form.
53: Obtained by gaining the Balloon form.
54: Obtained by gaining the Lamp form.
55: Obtained by gaining the Eye form.
56: Obtained by gaining the Vanish form.
57: Obtained by gaining the TV form.
58: Obtained by gaining the Rockstar form.
59: Obtained by gaining the Chubby form.
60: Obtained by gaining the Bunny form.
(Secret) Obtained by gaining the Spark form.
(Secret) Obtained by gaining the Jel-e form.
(Secret) Obtained by interacting with Bliss using the Jel-e form.
(Secret) Obtained by interacting with ???.
00: Obtained by viewing the ending and credits.


Ending Guide
Collecting all 11 forms will add a medal to your save file. Collecting all 60 drawings will add an additional medal to your save file.
Once you have collected all 11 forms and all 60 drawings head to Nat's balcony while you are awake. A cutscene will play where Nat walks up to the side of the balcony, and throws all of her drawings out into the wind. After this scene the credits will begin. A new icon will be added to your save file as well as a new drawing being added to your inventory.
A message is also shown after the credits that provides a code to enable "Frog notes" which work as developer commentary. The Frog notes can be found scattered throughout the whole game will provide info on the development of certain areas or forms. The code is: "Froggy".
Forms Guide (Ver.0.1.1a)
Forms and drawings guide for Drawing with Nat. (Ver.0.1.1a).
Version 0.1.1a is very different to Version 0.2, as such the forms and drawings are obtained in different ways.
Spark

Become an electrical entity.
Appearance: Nat becomes an electrical being.
Passive Effect: Nat doubles her movement speed.
Action: (A) None.
Location: Found in the Lamp Paths area.
Practical Uses: Allows the player to travel the dream world faster.
Sandy Statues (Floor 1) → Go up from the elevator until you can just barely see the top of it and then head left until you find a statue with its eyes open and a staircase leading down. → The Halls → Take the first door north from the staircase and enter the second door in the hallway. → The Halls (Outside area) → Head right until you find a glowing cube, then head north until you find another glowing cube, then head right and interact with the object that spins. → Lamp Paths → Head north west until you find two splitting paths, take the one going north, the effect can be found on the right as a (?) sphere.
Goop

Begin melting.
Appearance: Nat melts slightly and turns black and white.
Passive Effect: None.
Action: (A) Nat melts and becomes a goopy pile which makes her move very slowly.
Location: Found in Goop World.
Practical Uses: Can be used to enter the Sewers.
Bone World (Floor 2) → Head west from the Elevator until its just off screen then head south until you see a very small bone on the left. Head South West from the small bone until you find a two more small bones. Head directly south from these two bones and interact with the object that spins. → Goop World. → Head west and stick to the white path until you find a row of white objects. Head directly north from these objects and interact with an object that moves in place very quickly.
Bell

Become a large bell.
Appearance: Nat turns into a large golden bell.
Passive Effect: Nat moves slightly slower.
Action: (A) Nat's eye closes and she tolls the bell.
Location: Found in Bone World.
Practical Uses: Allows the player to teleport to the Elevator. This effect does not work in the Hanging Eye room.
This effect can be frustrating to gain as the bell character constantly moves from the starting point. If you do not find them it is best to wake up and try again.
Bone World (Floor 2) → Interact with the golden bell character. They tend to roughly start south west of the elevator.
Eye

Turn your head into an eye.
Appearance: Nat's head becomes a single large eye.
Passive Effect: None.
Action: (A) None.
Location: Found in Bone World.
Practical Uses: Can be used to enter Eye World.
Bone World (Floor 2) → Head right from the elevator. Once the Elevator is no longer on your screen head directly south and interact with the (?) sphere.
Vanish

Disappear.
Appearance: Nat's body becomes invisible, her clothing does not however.
Passive Effect: None.
Action: (A) None.
Location: Found in the Arcade.
Practical Uses: None.
Sandy Statues (Floor 1) → Go up from the elevator until you can just barely see the top of it and then head left until you find a statue with its eyes open and a staircase leading down. → The Halls → Take the first door north from the staircase and enter the second door in the hallway. → The Halls (Outside area) → Head right until you find a glowing cube, then head north until you find another glowing cube, then head right and interact with the object that spins. → Lamp Paths → Head north west until you find two splitting paths, take the west path and then go south and enter the door. → Road → Continue heading left until the screen goes dark → Arcade → Head south to find a ghost character and interact with it.
Chubby

Gain weight.
Appearance: Nat becomes fatter.
Passive Effect: None.
Action: (A) None.
Location: Found in The Halls (Outer area).
Practical Uses: None.
Sandy Statues (Floor 1) → Go up from the elevator until you can just barely see the top of it and then head left until you find a statue with its eyes open and a staircase leading down. → The Halls → Take the first door north from the staircase and enter the second door in the hallway. → The Halls (Outside area) → Head right until you find a glowing cube, then head north and interact with the (?) sphere.
Balloon

Fill yourself with air, becoming lighter.
Appearance: Nat inflates and lifts into the air, it is currently very unfinished.
Passive Effect: Nat moves slightly slower.
Action: (A) None.
Location: Found in The Halls.
Practical Uses: None.
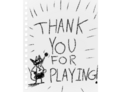
The code to unlock this is shown on the "Thanks for Playing" drawing.
Sandy Statues (Floor 1) → Go up from the elevator until you can just barely see the top of it and then head left until you find a statue with its eyes open and a staircase leading down. → The Halls → Take the first door north from the staircase and enter the first door in the hallway, you should now be in a dark room. In this room head North, West, South, East, North, North. Interact with the (?) Sphere.
Drawings
All of the Drawings that can be obtained in Version 0.1.1a
Obtained during the Tutorial.
Obtained outside of the Dream well.
Obtained by interacting with any of the Sandy Statues.
Obtained by visiting the Halls for the first time.
Obtained by interacting with Llygad.
Obtained by interacting with the Tall Weeper.

Obtained by visiting the Lamp paths for the first time.
Obtained by visiting the Arcade for the first time.
Obtained by visiting the Balcony for the first time.
Obtained by visiting the Sewers for the first time.

Obtained by interacting with the Sewer Glob.
Obtained by interacting with the giant Eye wall in Eye World.
Obtained by visiting the Hanging Eye.
Obtained by visiting Bone World for the first time.
Obtained by interacting with any of the Blue Dwellers.
Obtained by visiting Goop World for the first time.
Obtained by obtaining the Bell effect.
Obtained by obtaining the Chubby effect.
Obtained by obtaining the Eye effect.
Obtained by obtaining the Goop effect.
Obtained by obtaining the Spark effect.
Obtained by obtaining the Vanish effect.
Obtained by viewing the credits.


Ending
Ending to Version 0.1.1a
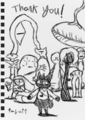
After the Player has collected all effects and drawings (Excluding the Balloon effect). head to the Elevator. An NPC named Larry will now be present inside. He states hes not supposed to be in the game and will ask if you want to view the credits and will give the Player an extra drawing called "Thanks for Playing" once the credits have concluded.