>Leizanami No edit summary |
>Leizanami m (moved How to play Japanese Fangames to Technical Difficulties: it's no more about Japanese Fangames only.) |
(No difference)
| |
Revision as of 19:12, 14 June 2010
Many people seem to have dificulties with playing fangames. Errors everywhere, missing files... So here is a short guide on how to do it.
I am currently looking for ways to make stuff work at Linux and other Operational Systems.
Japanese Support (Windows)
You must ABSOLUTELY have Japanese Locale (the last option on Applocale) on EVERYTHING. When extracting, use Applocale. When booting the game, use it. If you feel more comfortable, you can set your system's locale to Japanese instead of using Applocale.
You must have the East Asian Languague Support before even considering to play fangames.
Installing East Asian Language on Windows XP
NOTE: You must have your Windows XP installation CD or at least the necessary files.
- Enter the Control Panel, then go to Date, Time, Language and Regional Options, and finally to Regional and Language Options. Sometimes you will be able to go directly to the Regional and Language options depending on your Control Panel display.
- Click on the Languages tab and check the Install East Asian Languages box under Supplemental language support.
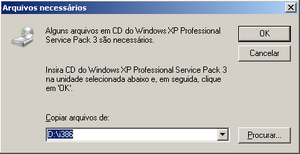
- Insert your OS installation CD and click Ok. If you don't have the installation CD, but have the /i386/ *NOT sure about this, since I have the Service Pack 3* folder with all the necessary files somewhere, click Ok and select the path where the folder is.
Downloading and using Microsoft Applocale
Microsoft Applocale is a useful tool that 'emulates' another language's locale, so you can use programs in different languages without changing the whole computer's locale. It can be downloaded here.
After installed, using Applocale is very simple.
- When you open the program, it asks if you want to add or remove programs or launch an application. Select the Launch an application box and then browse for the one you want. IMPORTANT NOTE: Applocale won't locale .rar and .zip files, so you'll have to search for your WinZip or WinRar .exe, and from there export your files. DON'T forget to always extract things with japanese locale!
- It then asks the language you want. Select the last one, or 日本語. That's japanese.
- It will then ask if you want a shortcut to the application. I usually make shortcuts for the games' RPG_RT.exe and for WinRar, so I won't have to do all the previous steps every time I want to play.
Just remember to use it EVERYWHERE related to japanese games.
Changing the System Locale
If you would rather change your whole computer's locale to japanese instead of using Applocale, do the following:
- Go to the Control Panel and then Regional and Language Options.
- Click on the Advanced tab.
- Under System current locale, select the language from the drop-down list.
RPG Maker Run-Time Package
To play most of the fangames, you will need the RPG Maker 2000 Run-Time Package, RTP for short.
You will most likely need the Japanese 2000 RTP, which can be downloaded here. YOU MUST USE JAPANESE LOCALE TO EXTRACT AND INSTALL, OR ELSE IT WON'T WORK. If the installation stops at 44% with an error, you most likely forgot to extract it with Applocale.
You might also need the English 2000 RTP, that can be downloaded here.
Dreamscaper uses the English RPG Maker 2003 RTP, which can be downloaded here.
If you feel the need to download the Japanese 2003 RTP, you can get it here. REMEMBER TO USE APPLOCALE!
Making games work on Windows Vista
If you have any troubles with making any games work on Vista, you can try these:
- Right-click the application and click on Properties.
- Click on Compability and select Windows XP Service Pack 2 (?).
- Click Ok.
OR
- Right-click the application
- Click on Advanced
- In the Dialog window, check the box Run As Administrator.
If neither of those work, you could always try running to the hills.

